Friday, May 15, 2015

Monster Bum Knit Pants

I'm sure that some of you have seen these Knitted Monster Pants before--and if you're like me, you had to find someone who could make them for you IMMEDIATELY! Thankfully my mom is a knitting whiz and loves to make things for the boy-o, so it was a win-win!

They are perfect for when it's cold outside but not snowy and wet. They don't really keep any wetness out (it's just yarn) but they definitely keep the boy-o nice and toasty warm for some outdoors fun, and they're much less bulky and restrictive than traditional snow pants are.


Plus, they look totally freaking adorable! Love my little monster bum. The waist has an adjustable elastic in them, and my mom made them nice and long with tapered ankles, so he'll have lots of room to grow into them next year without them sliding down over his shoes causing a tripping hazard.


There are many different patterns available for these pants. We searched Ravelry until we found one we liked, and used that one. You'll need a login name, but it's free to use! If you don't happen to know an able and willing knitter, there are also many stores on Etsy selling them as well.

Every little should have a pair of these adorable Monster Bum pants--because let's face it, sometimes our toddlers really *are* monsters and these pants are a great way to keep mama smiling all day!

Thursday, May 14, 2015

#ThrowBackThursday Baby Announcement

So I just realized that over my long blogging hiatus we made a very exciting family announcement which I haven't shared here yet. The boy-o played an integral role in sharing the news, and I think he has some mixed emotions about the whole situation!


We are expecting baby #2 mid August and we're so excited that the boy-o will be a big brother! We've decided to remain #TeamYellow for this pregnancy so we don't know whether it will be a boy or a girl. As long as baby is healthy, that's all that matters to us!

We decided to do our baby reveal on Valentine's Day, which seemed fitting since we made the announcement for the boy-o at Halloween. I also really loved making his chalkboard for his 1st birthday, so I wanted to try and incorporate that idea into our announcement as well. I was pretty happy with how it turned out, and it was so wonderful watching family and friends react as the news sunk in.

It's hard to believe that in a few more months it will be time to meet our newest addition already!

Tuesday, May 5, 2015

Basil Chicken Curry with Coconut Lime Rice

School is over now (for good!)... so I'll be better at updating again. Scouts honour.

I just made this amazing curry for lunch and wanted to share the recipe because it was soooo delicious! It was pretty easy to make and not very time consuming either--both a major plus in my books! I'm also trying to get better at cooking with spices and herbs and this was an excellent introduction to both those things.

This curry is probably about a medium spice level, and all the veggies in it (like corn!) add to a wonderful summer feeling, making this a perfect meal for a day like today when the weather is a little grey and dull but still warm outside.

So here it is: enjoy!

Ingredients:

Coconut Lime Rice

  • 1 (14 ounce) can coconut milk
  • 1 cup jasmine or basmati rice (I used brown rice)
  • 2 tablespoons fresh basil, chopped
  • 1 lime, juiced + zest

Curry

  • 1 pound boneless, skinless chicken, diced (or 2-3 cups cooked chickpeas)*
  • 2 bell peppers, chopped (I used one green, and one red)
  • 1 zucchini, chopped
  • 1 cup canned/frozen corn
  • 1 tablespoon fresh ginger, grated
  • 2 cloves garlic, grated or minced
  • 2 tablespoons olive oil
  • 2-3 tablespoon thai red curry paste (I used 3)
  • 1 tablespoon spicy curry powder
  • 1 (14 ounce) can coconut milk
  • 1/2 cup fresh basil, chopped
  • 1/4 cup fresh cilantro, chopped

Instructions:

Rice

1. Add the coconut milk to a medium size pot. Bring to a low boil and then add the rice. 
2. Stir to combine and then place the lid on the pot and turn the heat down to low. Allow the rice to cook ten minutes on low and then turn the heat off completely and let the rice sit on the stove, covered for another 20 minutes. 
3. After 20 minutes remove the lid and add the lime juice + zest and basil. Fluff the rice with a fork. 

Curry

1. Heat a large skillet over medium-high heat and add 1 tablespoon olive oil. Once hot, add the diced chicken and saute the chicken until browned all over and cooked through, about 5-10 minutes. Remove the chicken from the skillet and place on a plate.
2. Add another tablespoon olive oil to the skillet. Add the peppers and corn, saute 3-4 minutes and then toss in the zucchini, ginger and garlic. Saute the veggies another 5 minutes or until they just begin to soften. Add the chicken back to the skillet and toss everything together.
3. To the skillet add the curry powder and curry paste and give everything another good toss. Cook 1 minute and then add the coconut milk. Stir to combine, bring the mixture to a boil, cook 5 minutes or until the sauce thickens slightly. 
4. Remove from the heat and stir in the basil and cilantro.

Once the rice and curry mixture are done, you can serve the curry over the rice and if you wish add some naan on the side as well. 


Happy Cooking!

Saturday, January 17, 2015

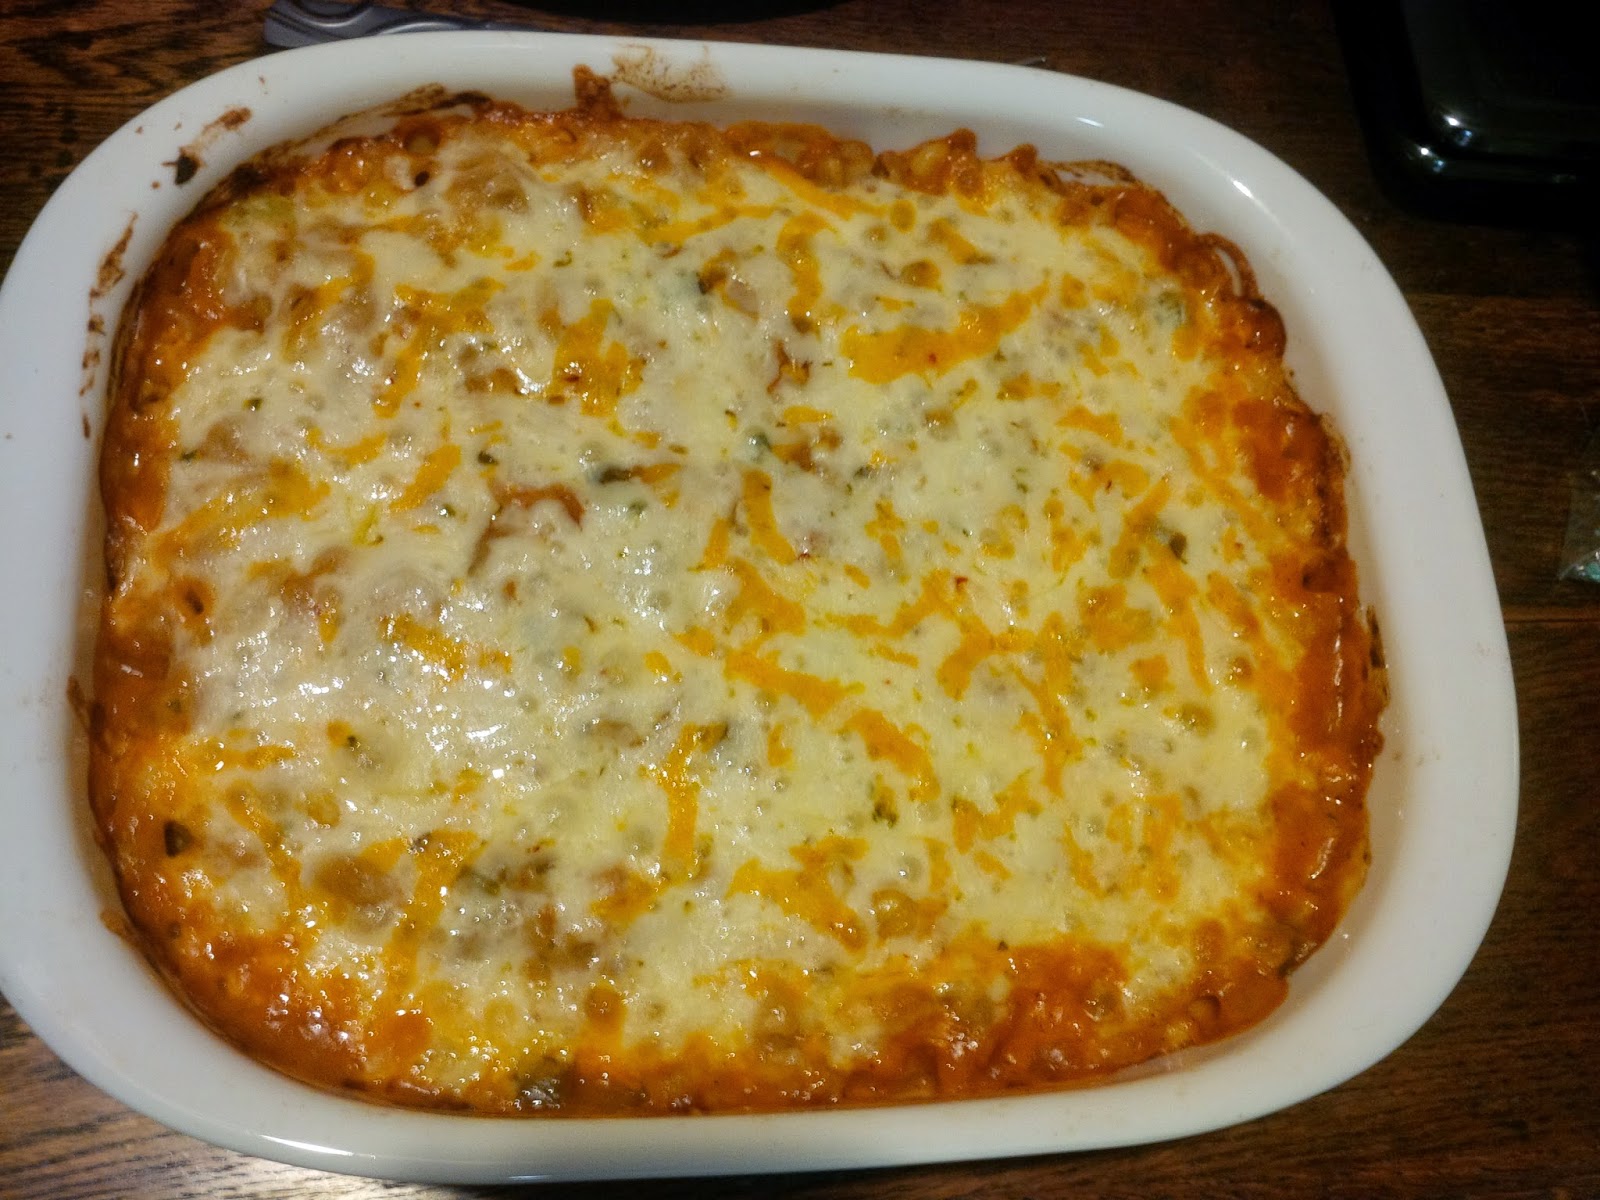
Mexican Tuna Macaroni Casserole

We're generally not big casserole eaters in our house. Not because we don't think they're delicious, it's just not something we usually think of when trying to make up our weekly meal plans. There was no plan for dinner tonight and I wanted something Mexican themed, and I knew we had some tuna in the cupboard just asking to get used. So I started doing some searching on the web for a Mexican Tuna casserole and was pretty disappointed at what I found. So I went "off book" and made up my own recipe.

And OMG. It was delicious and it smelled soooo good! And it was also super easy and an incredibly cost effective meal to boot. It made five adult servings, but you could easily get more if it was served with a side salad or something. There was supposed to be some black beans in there too, but I thought we had some so I didn't pick any up at the grocery store, and then got home and realized we in fact did not. I'll try adding them next time, but it was amazing without them, so maybe I won't bother!


Mexican Tuna Macaroni Casserole:

Ingredients:

- Approx 3 cups of cooked elbow macaroni (al dente, since it will cook more in the oven)
- 1 can of cheese soup (you could use a low fat cream soup as well if you preferred)
- 1 cup salsa
- 1/2 cup diced onion
- 1/2 cup diced celery
- olive oil
- 1 cup corn
- 1 can diced green chilies
- 1/2 TBS taco seasoning
- 1 can flaked tuna, drained (or chunked broken up, etc.)
- grated cheese 

 Instructions:

1. Cook macaroni according to directions on the box, but only cook till al-dente since the pasta will cook more in the oven and you don't want it to get mushy.
2. Add the diced onion and celery to a pan with a bit of oil to soften.
3. Transfer onion and celery to a large bowl. Add in soup, salsa, corn, green chilies, tuna, and taco seasoning. Mix well to combine.
4.. Pour tuna macaroni mixture into oven safe casserole dish. Top with grated cheese and bake at 350 degrees for approx 25 minutes, or until cheese is browned and bubbly.


Enjoy!

Monday, December 8, 2014

Christmas Craft Ideas: Handprint Christmas Tree

We've got our decorations up and the house is full of Christmas. The boy-o has been busy making some Christmas art, and one of them has been hung up in his play corner. We made a Christmas Tree out of his handprints, with his name written in block letters as the "stem" of the tree. I'm really pleased with how well it turned out, and the boy-o had a blast painting.


We simply painted his hand in one colour and stamped all of that colour of handprint, and then switched to the second colour and did all of those prints together. After we finished our specific painting project I just let him have at it with the paint which resulted in lots of smiles. 


This was a super easy craft to make and would be a great gift for those hard to buy for grandparents or aunts/uncles that you don't get to see very often. It also looks really cute framed up on the wall. Just remember to write the date on the back so years from now when you're looking at it again you remember when it was made. 

Sunday, November 30, 2014

Christmas Musings: 24 Books for Advent

I have to admit that in the last several years I've really lost that "magical" Christmas feeling. As a kid it was amazing of course, but as I got older I became rather disenchanted with Christmas and the crazy consumer culture that exists around it. I don't like accumulating "stuff" just for the sake of it and I really struggle with the idea of making up Wish Lists filled with things I don't need.

I've noticed this year though now that the boy-o is old enough to have at least some idea of what's going on I'm a little more excited about Christmas than I have been in past years. We've decided to start a new "Advent Calendar" tradition with the boy-o and rather than opening a cheap cardboard chocolate calendar window every day, we've decided to wrap up 24 books (some of them books we already had, and some of them new ones) and every night before bed the boy-o will get to unwrap one to read as our bedtime story that night. There will be one book for each of the 24 days, with the 24th book being "Twas The Night Before Christmas."


Most of the books are winter or Christmas themed but not all of them since we used some books we already had mixed in with some new books. Next year we'll by the second half of them so that they're all winter/Christmas themed. After the 12 Days of Christmas are over we'll put the books away again to save them for Advent next year. We're all big fans of reading in our house, and the boy-o loves books, so this seemed like a perfect way to keep that excitement about books going for as long as possible!

Tuesday, November 11, 2014

Kid's "Busy Bag" Items: Part I

I've decided to take up a new creative enterprise and make up some portable activities for toddlers and young children to use in the car, on planes, at restaurants, in doctor's offices, or any other place kids are expected to sit quietly. I've decided to make up several different little activities that I can put into these "Busy Bags" and then sell them at local craft shows.


The first one that I've made up is something that you might have seen floating around the internet already, and that's the DVD case turned into portable drawing/colouring station. The first one I made was definitely a bit of an experiment, but I think it turned out quite well and is something that I can work with to perfect the pattern for the next one.


I also really love the concept of upcycling and giving old materials new life--especially when it comes to kids stuff since they grow and change so fast.


I think the idea of having something like this to tuck away in your diaper bag/purse/stroller is genius and would definitely make life a little easier sometimes. What do you think?

Monday, November 10, 2014

Beef and Sausage Slow-Cooker Stew

When it gets chilly outside nothing beats throwing dinner together in a slow-cooker and letting it simmer away all day. It's such a relief to come home to a hot dinner that's filled the apartment with delicious smells and is ready when I am. We're trying to use the slow-cooker more, and part of that has been venturing out into stews. I'm not a huge fan of stew because I don't dig chunks of meat like that, but making it myself was a much better experience. I was able to trim the meat to my preferences, and I made sure to dice it into smaller bite sized pieces (rather than the huge chunks you often see--which, I'll admit, gross me out.)

This is the recipe that we used this week:

Beef and Sausage Slow-Cooker Stew:


Ingredients:


- 1/2 cup all purpose flour
- 2 TSP salt
- 1 TSP black pepper
- 3 lbs beef for stew
- 1 can diced tomatoes in juice, undrained
- 1/2 lb smoked sausage, diced
- 3 potatoes, peeled and diced
- 1 cup chopped leak
- 1 cup chopped onion
- 4 stalks of celery, diced
- 1/2 cup chicken broth
- 3 gloves of garlic, minced
- 1 TSP dried thyme

Directions:


1. Combine 1/2 cup flour, salt, pepper, and beef into sealed bag and shake to coat.
2. Place beef in slow cooker, and add remaining ingredients. Sir well and cover. Cook on low 8 to 12 hours, or on high 4 to 6 hours.
3. If stew is too liquidy before serving, add a TBSP of flour to stew and stir well. Simmer until stew thickens and serve!


This delicious stew will go perfectly with a nice big hunk of zucchini and cheese damper too! The meat was so tender it essentially fell apart in the stew making it almost more of a ragu than a stew and it was delicious.