Wednesday, May 20, 2015

Homemade Slime: AKA Gak to Some

I've been wanting to try out a slime recipe for a while now, but this was proving to be much more difficult than I thought. There are ALL KINDS of recipes floating around on the web about how to make Borax-Free slime, and I can tell you from personal experience that they were disasters.

We tried making it with liquid starch, we tried making it with laundry detergent, and it was all epic fail. EPIC. So I gave in and tried making it with Borax and we all lived to tell the tale. The boy-o didn't even attempt to put it near his mouth, and since I was the one making it, he was never near the original Borax powder, and the amount that goes into the slime is so minimal that I'm not going to worry about it.


I used regular white glue when I made it and didn't have any food colouring on hand the first time I tried making it, but I did add some blue sparkles to it. This gave it a fun sheen, but the sparkles definitely come out, and I've been picking them off him for days--consider yourself warned!


At first he really wasn't too sure about the slime since it was cold and a really different texture than anything else he's used to. He soon got over his hesitation though and started pulling and pushing it around the table. It was a great sensory experience for him. Our slime was quite thick and rubbery, and not particularly "slimy" so the next time I try it I'll add less Borax. (And some food colouring!)

So after a quick trip to the store to pick up some food colouring after the boy-o went to bed tonight, I decided to try making some more slime now that I've got some food-colouring. I made a pink and green one. All of the slimes are simply stored in their own Ziploc Baggies until we want to take them out and play again!

Here's the recipe that we used to make our slime:

Slime:

Ingredients:
- 1/2 cup Elmer's Glue
- 1 TSP Borax
-  1 and 1/2 cup Water
- Food Colouring (optional)


Directions:

1. In one bowl mix 1/2 cup (4 oz) glue and 1/2 cup water. Add food coloring if you want colored slime.

2. In the other bowl, mix 1 teaspoon borax with 1 cup water until the borax is dissolved.
3. Add the borax mixture to the glue solution, stirring slowly. You may not need to add it all!
4. The slime will begin to form immediately; stir as much as you can, then dig in and knead it with your hands until it gets less sticky. (No one makes slime without getting a little messy!) Don't worry about any leftover water in the bowl; just pour it out.

Pink and Green Slime
The pink one is a pretty similar consistency to the original white one with the blue sparkles, but the green one is suuuuper slimy, which is fitting I supposed since it's green and all! 


The new colours have been stored away in some baggies too and I can't wait to see how the boy-o reacts to the new slimes and the texture of the green one.

Slime with Borax

Tuesday, May 19, 2015

Simple Toddler Activity- Q Tip Drop

Having a toddler can be tough sometimes--they don't seem to have an "off" switch, unless they're asleep. This has made it more important than ever to have some "quiet time" activities the boy-o can work on while I'm trying to get jobs done around the house, like making dinner in particular.


This is a bit of a throwback to the Ice Cream Bucket and Popsicle Stick idea, except it's much more compact which is great for travelling and even simpler to make. Basically all you need is an empty Parmesan Cheese container and some Q-Tips. I purposely bought a small clear container of Parm Cheese to make it suit the purpose more, but any of them will do just fine!

The concept is pretty simple.... give them the container with the flap open that has the small holes for shaking (not the large spoon one) and a pile of Q-Tips. Show them how to drop the Q-Tips in the holes and then let them have at it! This is a fantastic activity for working on fine motor control, not only for picking up and holding the Q-Tips, but also getting them into the little holes.


To take it up a notch, we also practiced our counting each time we put one in which is a great way to reinforce numbers while playing. The boy-o had a great time putting all the Q-tips in, and then unscrewed the lid himself to dump them out and started over again!


Because we used the small container size, it'll be really easy to toss in a carry-on or diaper bag for travelling purposes, and when not actively in use, you can just store the Q-Tips right inside the container. Since the Q-Tips aren't actually being used for their intended purpose, I'd definitely just recommend buying them from a dollar store making this simple little activity incredibly inexpensive as well.


Monday, May 18, 2015

Cheesy Sausage and Broccoli Quinoa Bake

We had some broccoli sitting around in the fridge that really needed to get used up, and I really wanted some cheesy carb-y comfort food. The result? A delicious casserole dish that used up that broccoli mixed with some turkey sausage, healthy quinoa, and lots of cheesy heaven. Did I mention it was cheesy?

Casseroles in general are something I love, especially fully self contained ones because I really *hate* having to come up with side dishes, which is particularly difficult since I dislike many cooked vegetables. Although a side-salad would definitely not be amiss with this dish, I wanted cheesy carb-y comfort food remember?


So here's the recipe I came up with for dinner, and it was totally delicious. I split the mixture up into half so I could bake half tonight and then freeze the other half for a weeknight sometime later when I need a quick easy meal I can toss in the oven.

Cheesy Sausage and Broccoli Quinoa Bake

Ingredients:

- 1.5 cups of uncooked quinoa (about 3 cups cooked)
- 2 heads of broccoli crowns, dice the florets, discard stem
- 1 lb of turkey sausage, browned and diced
- 1 small onion, diced
- 1 cup of cheddar cheese, plus extra for sprinkling on top
- 1 can cheddar cheese soup
- 1 cup of milk
- 2 TBSP butter
- 3 TBSP all purpose flour
- 2 cloves of garlic, minced
- 1 TSP curry powder
- 1/2 TSP cayenne pepper

Directions:

1. Cook quinoa according to package instructions. 
2. Bring water in a pot to boil and add in broccoli. Boil for 5 minutes or until broccoli is a little softened. Drain broccoli and mix in with the quinoa.
3. Add the 2 TBSP of butter to a heated pan and allow to melt. Add in the onion and garlic. Saute for a minute then add the flour, cayenne pepper, and curry powder. Mix well.
4. Combine the canned soup and milk together in a small bowl, and add to the mixture in the pan. Mix well and once the soup has thinned out, slowly add in the cup of cheddar cheese allowing it to melt into the sauce. 


5. Once all of the cheese has been added and melted pour the sauce mixture over top of the quinoa and broccoli. Add in the chopped sausage and mix well to make sure the quinoa mixture is well coated with the sauce. 
6. I divided up the mixture at this point in half to freeze half and bake half.


7. Put quinoa mixture into a baking dish and sprinkle extra cheese on top. Bake in the oven at 400 degrees for 25-30 minutes, or until cheese is melted and casserole is heated through.


Enjoy the cheesy goodness!!


Sunday, May 17, 2015

Tricycle Diaper Cake

One of my cousins recently had a baby shower, and like us, they were staying #TeamYellow. I always have a hard time trying to decide what to buy for showers because what one mom finds invaluable, might be totally useless to another mom. One thing that every mom needs though is diapers! Diapers although totally necessary, are not very cute or visually appealing. (Although very convenient to wrap!)

I've seen diaper cakes sold before at craft shows and stuff and decided I was going to look for one of those for her. The local baby boutique store had some lovely plain ones that were straight-up cake style, but they were very "girl" or "boy" and had a crap-ton of pins in them, which to me just sounds like a terrible idea in a baby gift. So I took matters into my own hands and decided to make my own diaper cake, that was both pin-less, and didn't damage or ruin ANY of the baby items in the cake. (like crunching all the diapers up into little rolls)


After some wandering around on the web I came across this awesome tutorial for making a Tricycle Diaper Cake. Although this was my guiding inspiration, I changed mine up a little bit. Rather than using a bib to make the "mud flap" I used another receiving blanket folded up, which also gave me the seat at the back. I didn't bother with the bottle part either, but I did add a rider to my tricycle. Since my cousin has asked for the Little Lambs crib set, I picked up a stuffed lamb to ride my tricycle.

The contents for my tricycle included: A Pack of 64 Pampers Size 1 Diapers, 3 Receiving Blankets, 1 Pair of Socks, 1 Stuffed Lamb.


I was pretty impressed with how easy it was to make an how well it turned out, and it seemed like everyone at the shower liked it too. One of my other cousins actually asked if she could use that idea for another shower she had coming up--so I call that a win!


AND, as promised, there isn't a single pin holding things together, and there's no tape on the diapers, and nothing is rolled, crumpled or otherwise unusable. This is a 100% functional shower gift that's also 100% adorable.

Friday, May 15, 2015

Monster Bum Knit Pants

I'm sure that some of you have seen these Knitted Monster Pants before--and if you're like me, you had to find someone who could make them for you IMMEDIATELY! Thankfully my mom is a knitting whiz and loves to make things for the boy-o, so it was a win-win!

They are perfect for when it's cold outside but not snowy and wet. They don't really keep any wetness out (it's just yarn) but they definitely keep the boy-o nice and toasty warm for some outdoors fun, and they're much less bulky and restrictive than traditional snow pants are.


Plus, they look totally freaking adorable! Love my little monster bum. The waist has an adjustable elastic in them, and my mom made them nice and long with tapered ankles, so he'll have lots of room to grow into them next year without them sliding down over his shoes causing a tripping hazard.


There are many different patterns available for these pants. We searched Ravelry until we found one we liked, and used that one. You'll need a login name, but it's free to use! If you don't happen to know an able and willing knitter, there are also many stores on Etsy selling them as well.

Every little should have a pair of these adorable Monster Bum pants--because let's face it, sometimes our toddlers really *are* monsters and these pants are a great way to keep mama smiling all day!

Thursday, May 14, 2015

#ThrowBackThursday Baby Announcement

So I just realized that over my long blogging hiatus we made a very exciting family announcement which I haven't shared here yet. The boy-o played an integral role in sharing the news, and I think he has some mixed emotions about the whole situation!


We are expecting baby #2 mid August and we're so excited that the boy-o will be a big brother! We've decided to remain #TeamYellow for this pregnancy so we don't know whether it will be a boy or a girl. As long as baby is healthy, that's all that matters to us!

We decided to do our baby reveal on Valentine's Day, which seemed fitting since we made the announcement for the boy-o at Halloween. I also really loved making his chalkboard for his 1st birthday, so I wanted to try and incorporate that idea into our announcement as well. I was pretty happy with how it turned out, and it was so wonderful watching family and friends react as the news sunk in.

It's hard to believe that in a few more months it will be time to meet our newest addition already!

Tuesday, May 5, 2015

Basil Chicken Curry with Coconut Lime Rice

School is over now (for good!)... so I'll be better at updating again. Scouts honour.

I just made this amazing curry for lunch and wanted to share the recipe because it was soooo delicious! It was pretty easy to make and not very time consuming either--both a major plus in my books! I'm also trying to get better at cooking with spices and herbs and this was an excellent introduction to both those things.

This curry is probably about a medium spice level, and all the veggies in it (like corn!) add to a wonderful summer feeling, making this a perfect meal for a day like today when the weather is a little grey and dull but still warm outside.

So here it is: enjoy!

Ingredients:

Coconut Lime Rice

  • 1 (14 ounce) can coconut milk
  • 1 cup jasmine or basmati rice (I used brown rice)
  • 2 tablespoons fresh basil, chopped
  • 1 lime, juiced + zest

Curry

  • 1 pound boneless, skinless chicken, diced (or 2-3 cups cooked chickpeas)*
  • 2 bell peppers, chopped (I used one green, and one red)
  • 1 zucchini, chopped
  • 1 cup canned/frozen corn
  • 1 tablespoon fresh ginger, grated
  • 2 cloves garlic, grated or minced
  • 2 tablespoons olive oil
  • 2-3 tablespoon thai red curry paste (I used 3)
  • 1 tablespoon spicy curry powder
  • 1 (14 ounce) can coconut milk
  • 1/2 cup fresh basil, chopped
  • 1/4 cup fresh cilantro, chopped

Instructions:

Rice

1. Add the coconut milk to a medium size pot. Bring to a low boil and then add the rice. 
2. Stir to combine and then place the lid on the pot and turn the heat down to low. Allow the rice to cook ten minutes on low and then turn the heat off completely and let the rice sit on the stove, covered for another 20 minutes. 
3. After 20 minutes remove the lid and add the lime juice + zest and basil. Fluff the rice with a fork. 

Curry

1. Heat a large skillet over medium-high heat and add 1 tablespoon olive oil. Once hot, add the diced chicken and saute the chicken until browned all over and cooked through, about 5-10 minutes. Remove the chicken from the skillet and place on a plate.
2. Add another tablespoon olive oil to the skillet. Add the peppers and corn, saute 3-4 minutes and then toss in the zucchini, ginger and garlic. Saute the veggies another 5 minutes or until they just begin to soften. Add the chicken back to the skillet and toss everything together.
3. To the skillet add the curry powder and curry paste and give everything another good toss. Cook 1 minute and then add the coconut milk. Stir to combine, bring the mixture to a boil, cook 5 minutes or until the sauce thickens slightly. 
4. Remove from the heat and stir in the basil and cilantro.

Once the rice and curry mixture are done, you can serve the curry over the rice and if you wish add some naan on the side as well. 


Happy Cooking!

Saturday, January 17, 2015

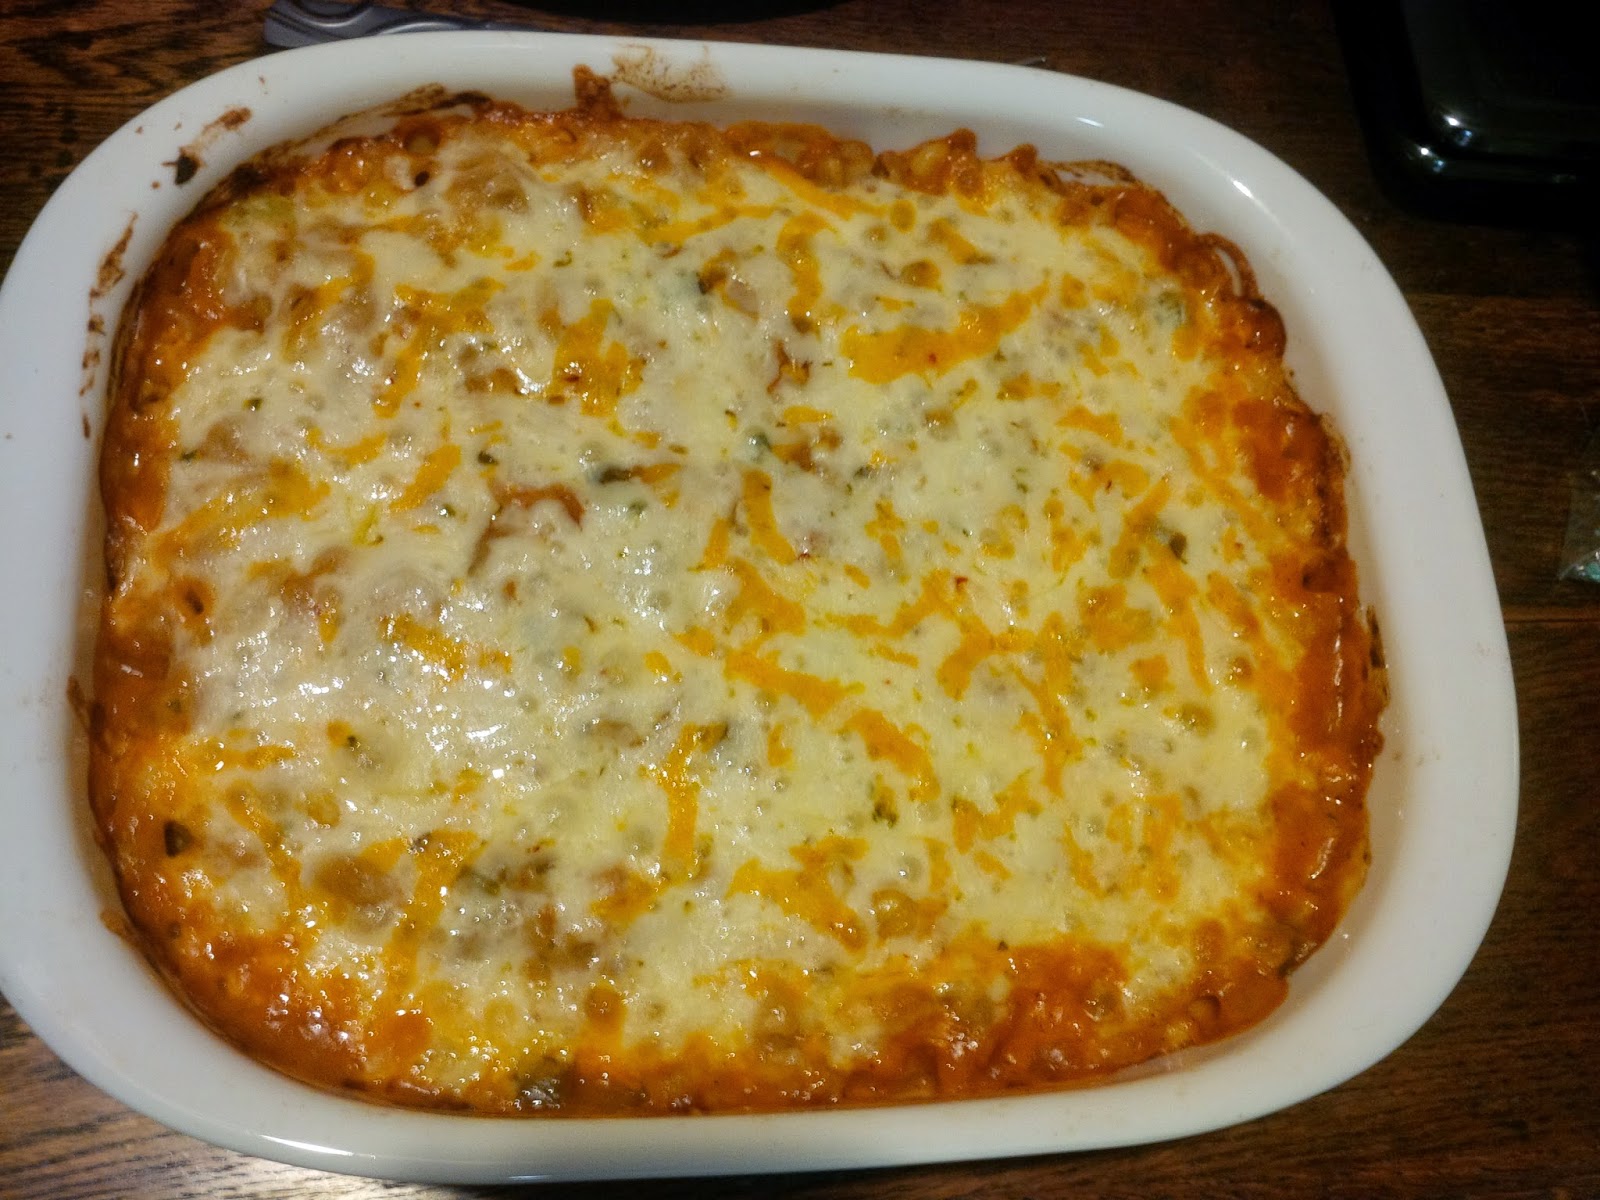
Mexican Tuna Macaroni Casserole

We're generally not big casserole eaters in our house. Not because we don't think they're delicious, it's just not something we usually think of when trying to make up our weekly meal plans. There was no plan for dinner tonight and I wanted something Mexican themed, and I knew we had some tuna in the cupboard just asking to get used. So I started doing some searching on the web for a Mexican Tuna casserole and was pretty disappointed at what I found. So I went "off book" and made up my own recipe.

And OMG. It was delicious and it smelled soooo good! And it was also super easy and an incredibly cost effective meal to boot. It made five adult servings, but you could easily get more if it was served with a side salad or something. There was supposed to be some black beans in there too, but I thought we had some so I didn't pick any up at the grocery store, and then got home and realized we in fact did not. I'll try adding them next time, but it was amazing without them, so maybe I won't bother!


Mexican Tuna Macaroni Casserole:

Ingredients:

- Approx 3 cups of cooked elbow macaroni (al dente, since it will cook more in the oven)
- 1 can of cheese soup (you could use a low fat cream soup as well if you preferred)
- 1 cup salsa
- 1/2 cup diced onion
- 1/2 cup diced celery
- olive oil
- 1 cup corn
- 1 can diced green chilies
- 1/2 TBS taco seasoning
- 1 can flaked tuna, drained (or chunked broken up, etc.)
- grated cheese 

 Instructions:

1. Cook macaroni according to directions on the box, but only cook till al-dente since the pasta will cook more in the oven and you don't want it to get mushy.
2. Add the diced onion and celery to a pan with a bit of oil to soften.
3. Transfer onion and celery to a large bowl. Add in soup, salsa, corn, green chilies, tuna, and taco seasoning. Mix well to combine.
4.. Pour tuna macaroni mixture into oven safe casserole dish. Top with grated cheese and bake at 350 degrees for approx 25 minutes, or until cheese is browned and bubbly.


Enjoy!